Introduction #
This document provides instructions for installing Deepfactor Mutating admission controller using helm charts. Please ensure you have the required prerequisites for installing the Deepfactor webhook specified in the following article.
Prerequisites for installing Deepfactor Mutating Admission webhook
Installation #
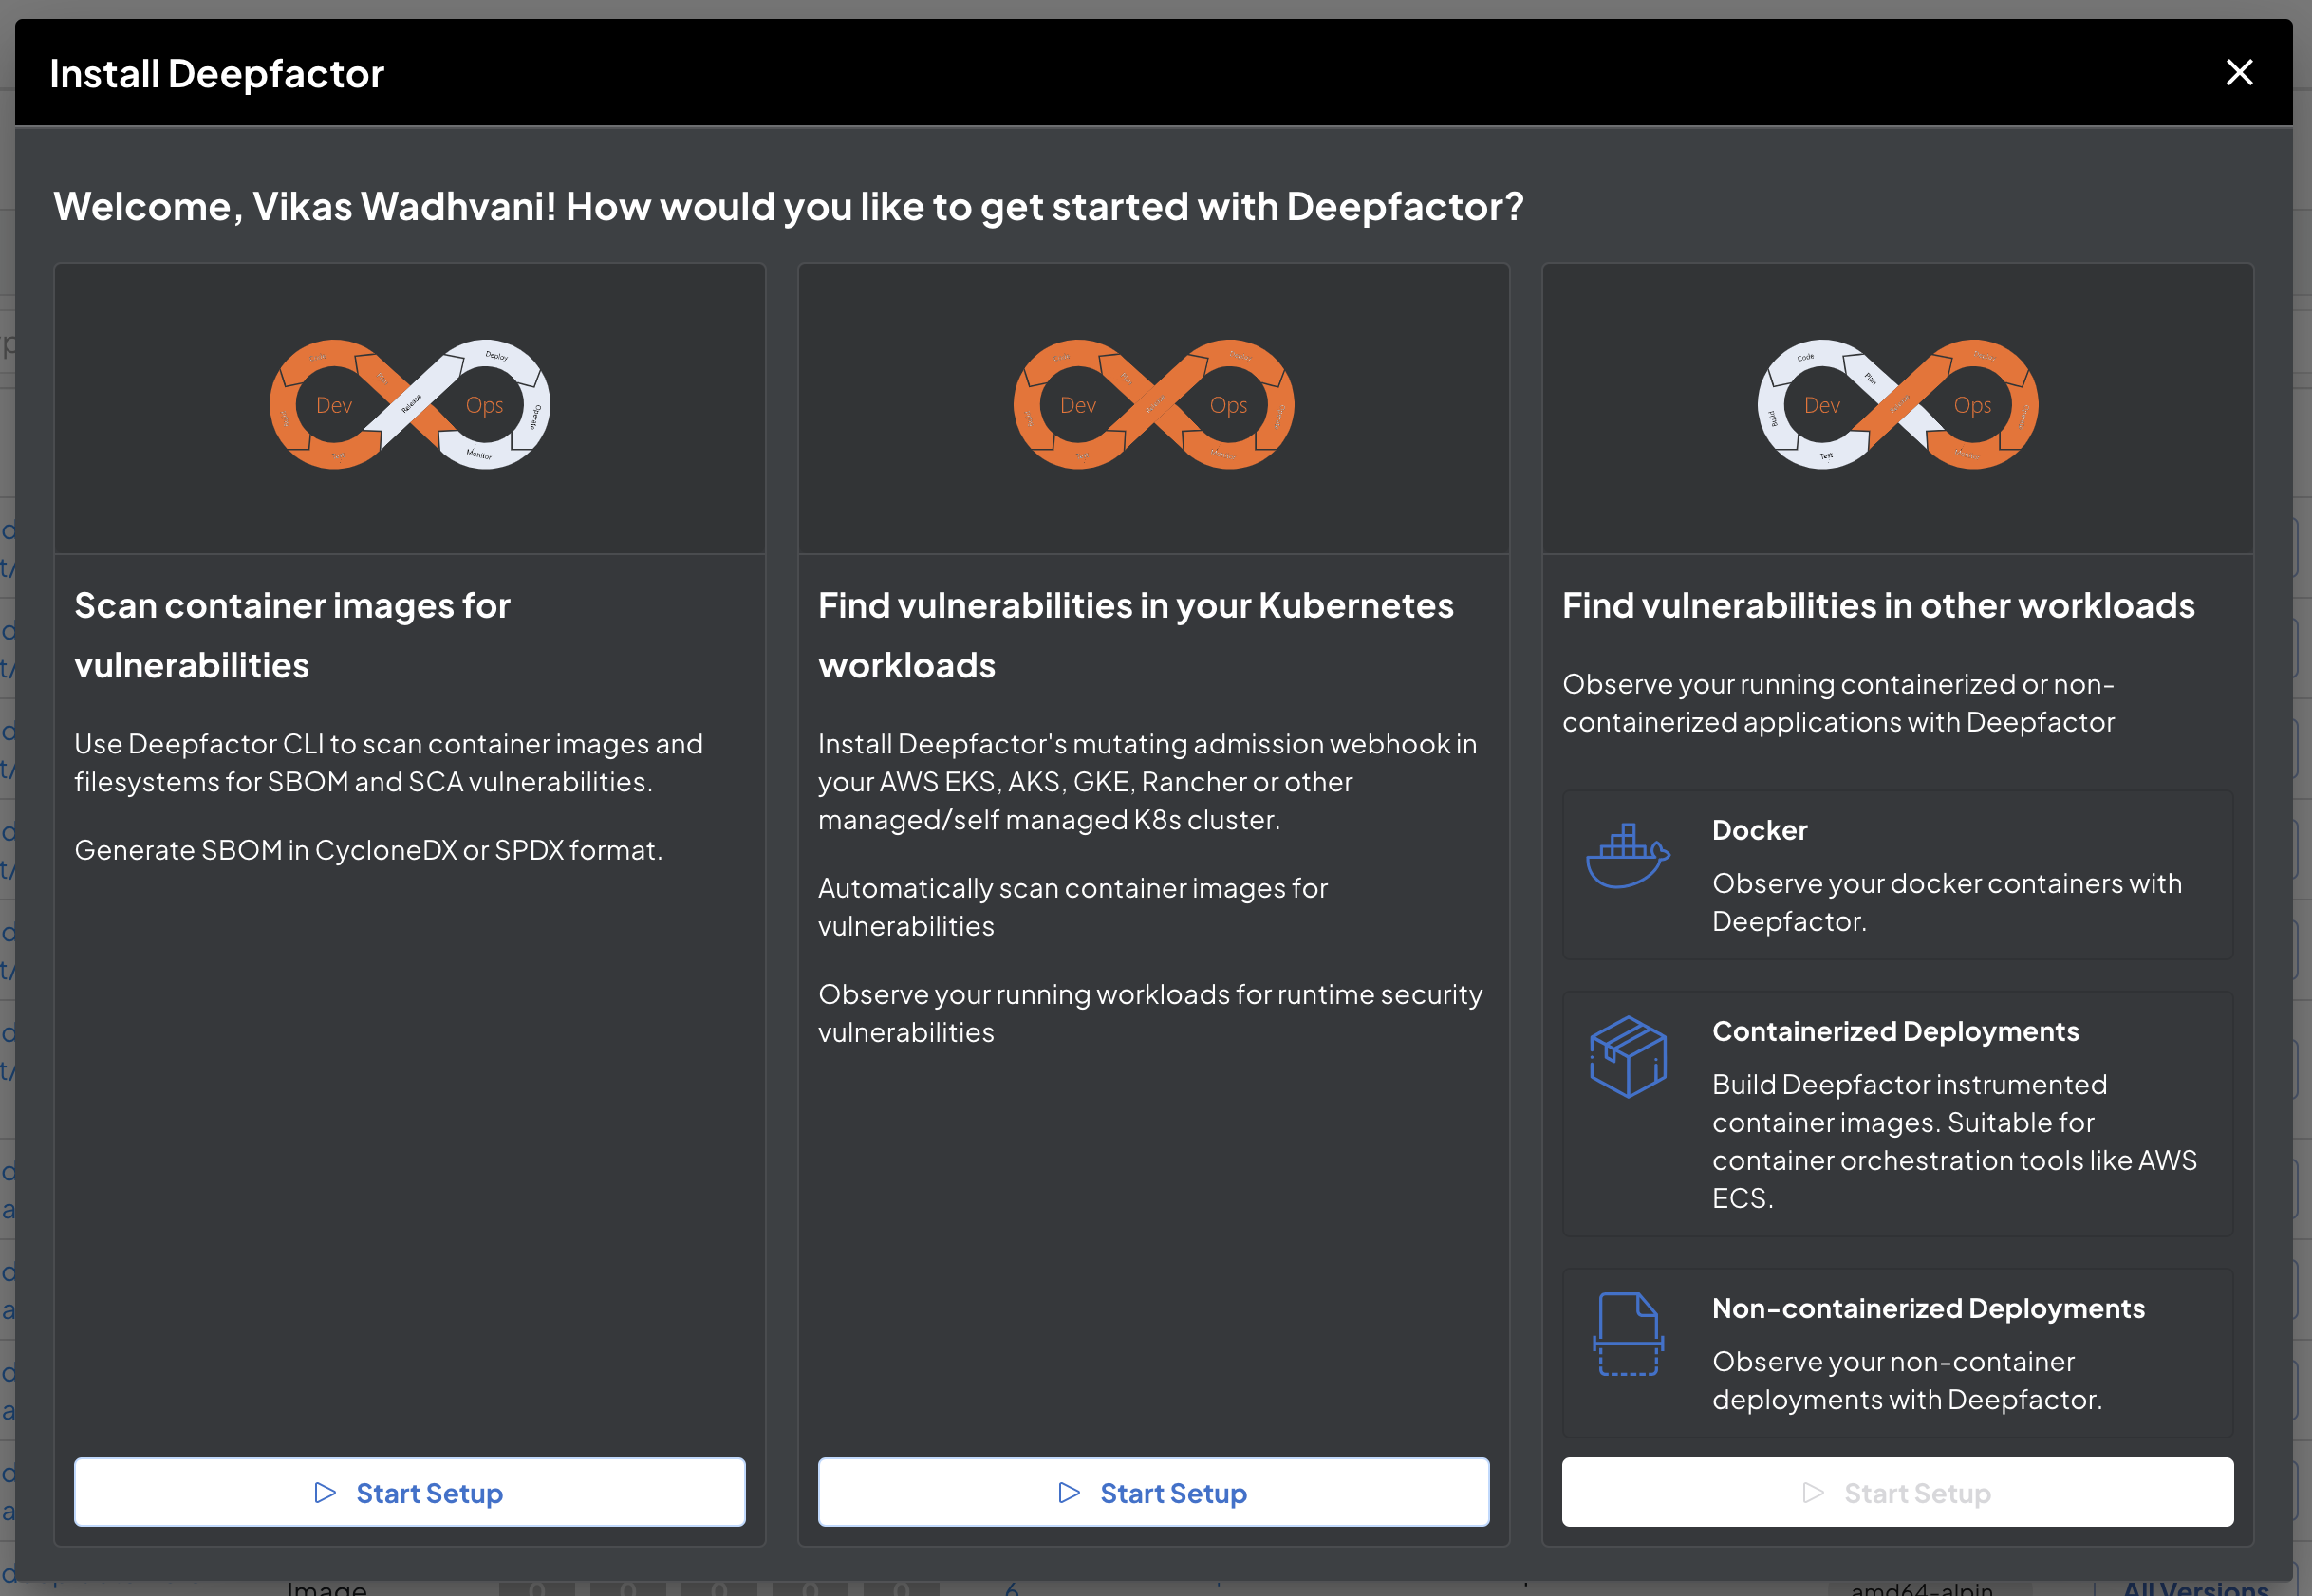
Select Kubernetes setup #
Login to your Deepfactor portal UI and click on the start button on the top right section of the header. In the ‘Install Depfactor’ dialog, click on ‘Start Setup’ button under ‘Find vulnerabilities in your Kubernetes workloads’ section.
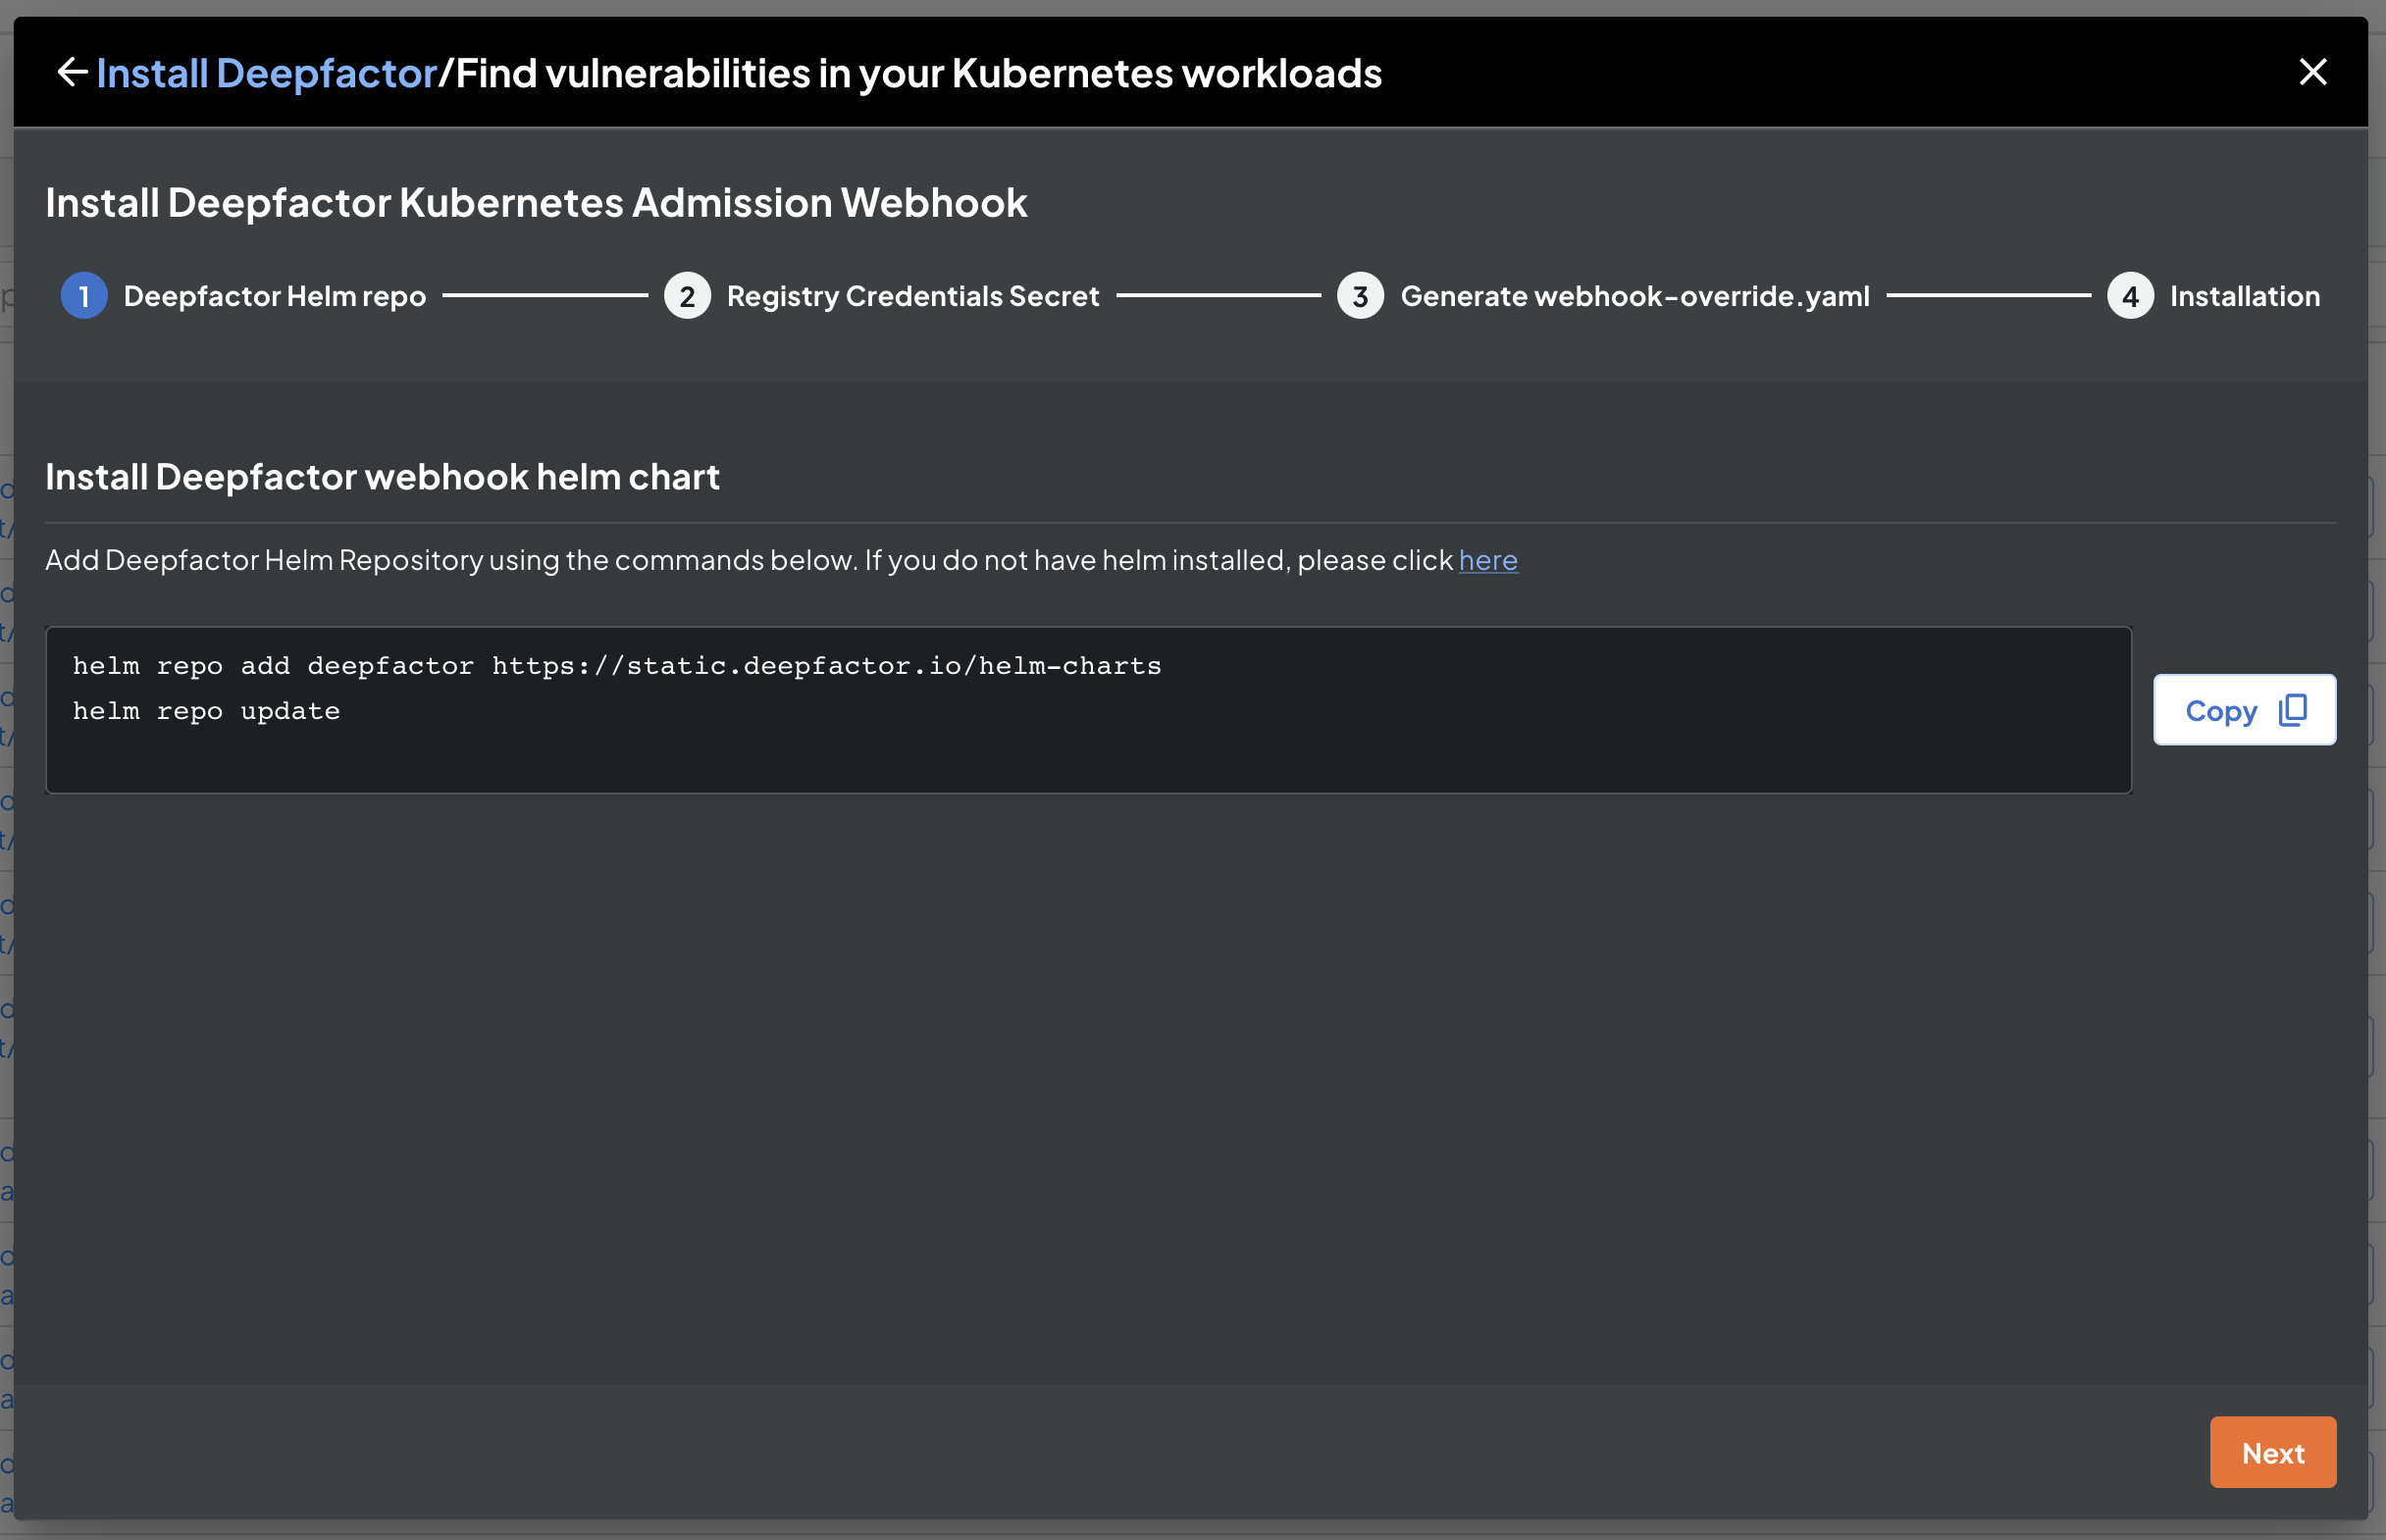
Add Deepfactor Helm Repository #
Add Deepfactor Helm Repository using the commands given in the dialog. If you do not have helm installed, please click here.
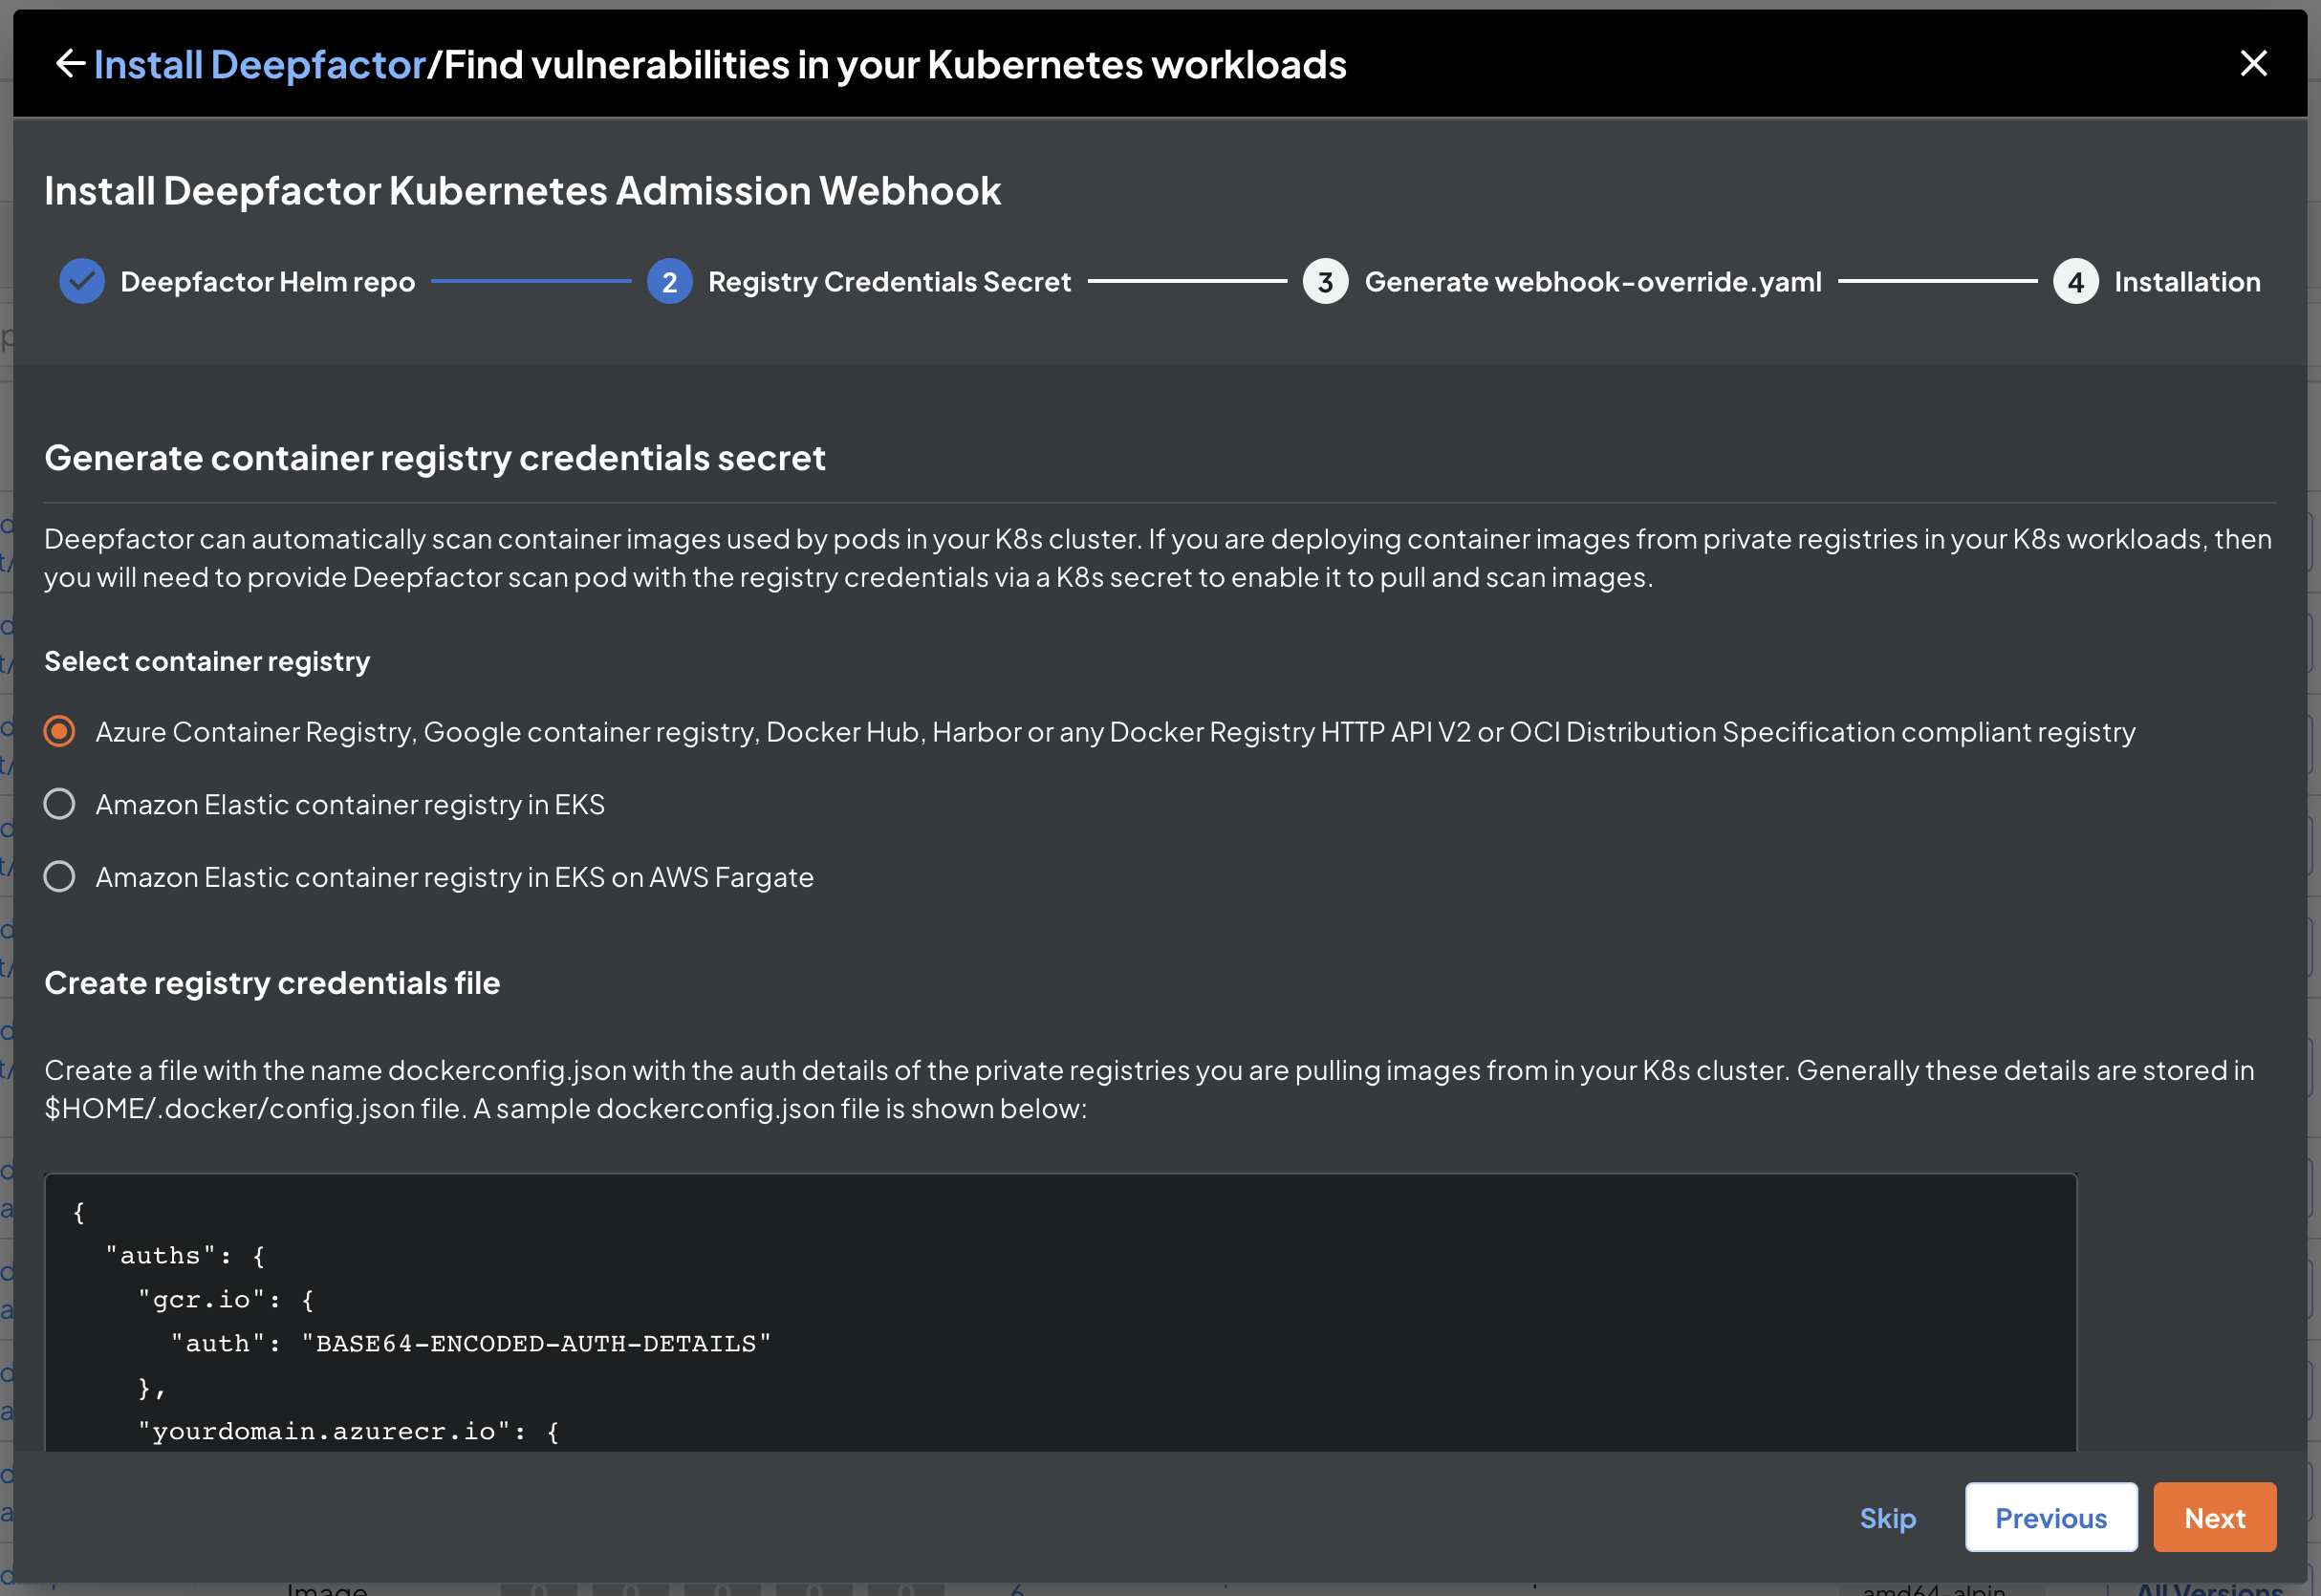
Generate container registry credentials secret #
Deepfactor can automatically scan container images when a new pod is started to generate SBOM and find associated SCA vulnerabilities. If you are using an authenticated container registry to host your container images, Deepfactor will need registry credentials to pull and scan images. The registry credentials can be supplied securely using a kubernetes secret. The next step in the installation dialog guides you to create this registry credentials secret. Select the registry type and follow on the on screen instructions. If you are using an unauthenticated registry, please skip this step.
#
Generate Helm override parameters yaml #
In this step, we will generate an override.yaml file which needs to be supplied to the helm install command in the next step. Please provide a unique cluster name to identify this cluster. You will be able to see this cluster name under Kubernetes clusters after successful installation and you will be able to configure Deepfactor webhook behavior for every namespace within the cluster.
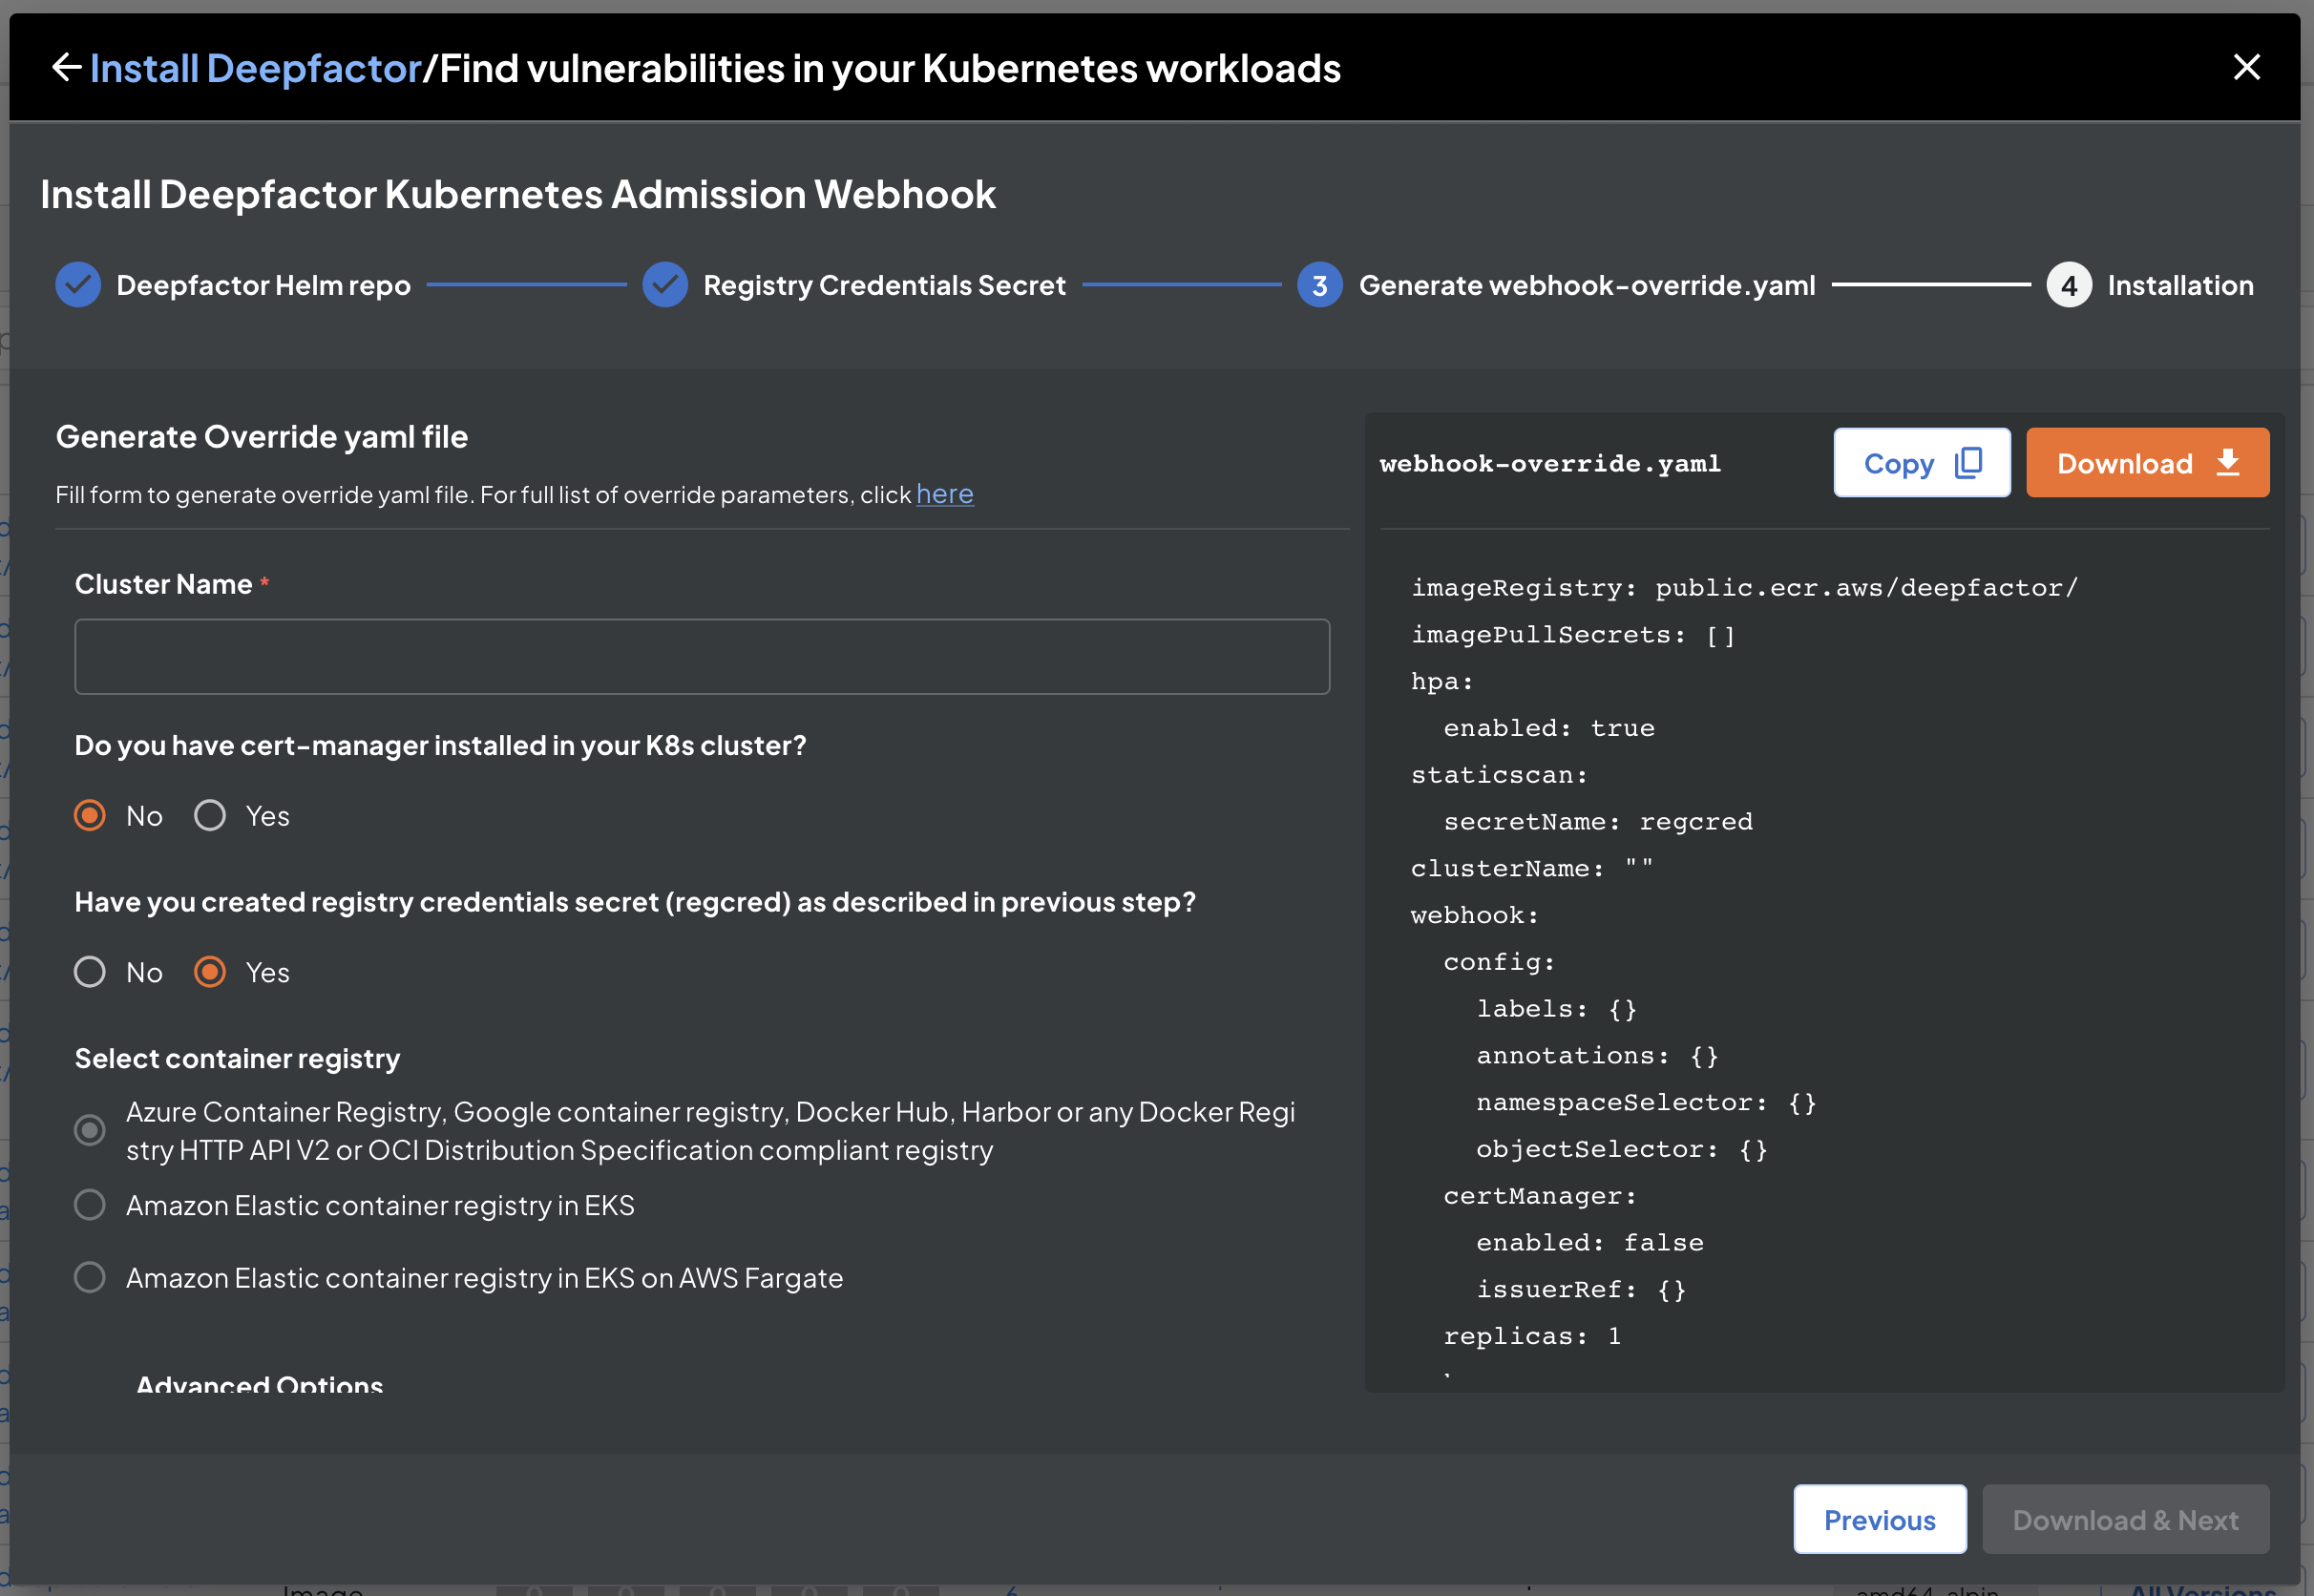
The Deepfactor webhook needs a TLS certificate to communicate with the kube api server. Deepfactor helm charts can automatically generate a self-signed certificate as part of the installation process and we highly recommend this approach as it results in seamless installation of the webhook.
If you are using cert manager to manage TLS certificates within your cluster and want Deepfactor webhook TLS certificate also to be managed using cert manager, please select ‘Yes’ for ‘Do you have cert-manager installed in your K8s cluster?’. Please note, Deepfactor will try to use the pre-installed cert manager in the cluster. If cert manager is not installed, installation of Deepfactor helm charts will fail.
If you want to supply your own custom certificate, please refer to this section.
Install Deepfactor mutating admission webhook #
Click on ‘Download & Next’ button. The override yaml file, webhook-override.yaml file will automatically be downloaded to your computer. Please pass the downloaded file to the helm install command as shown in the on screen instructions.
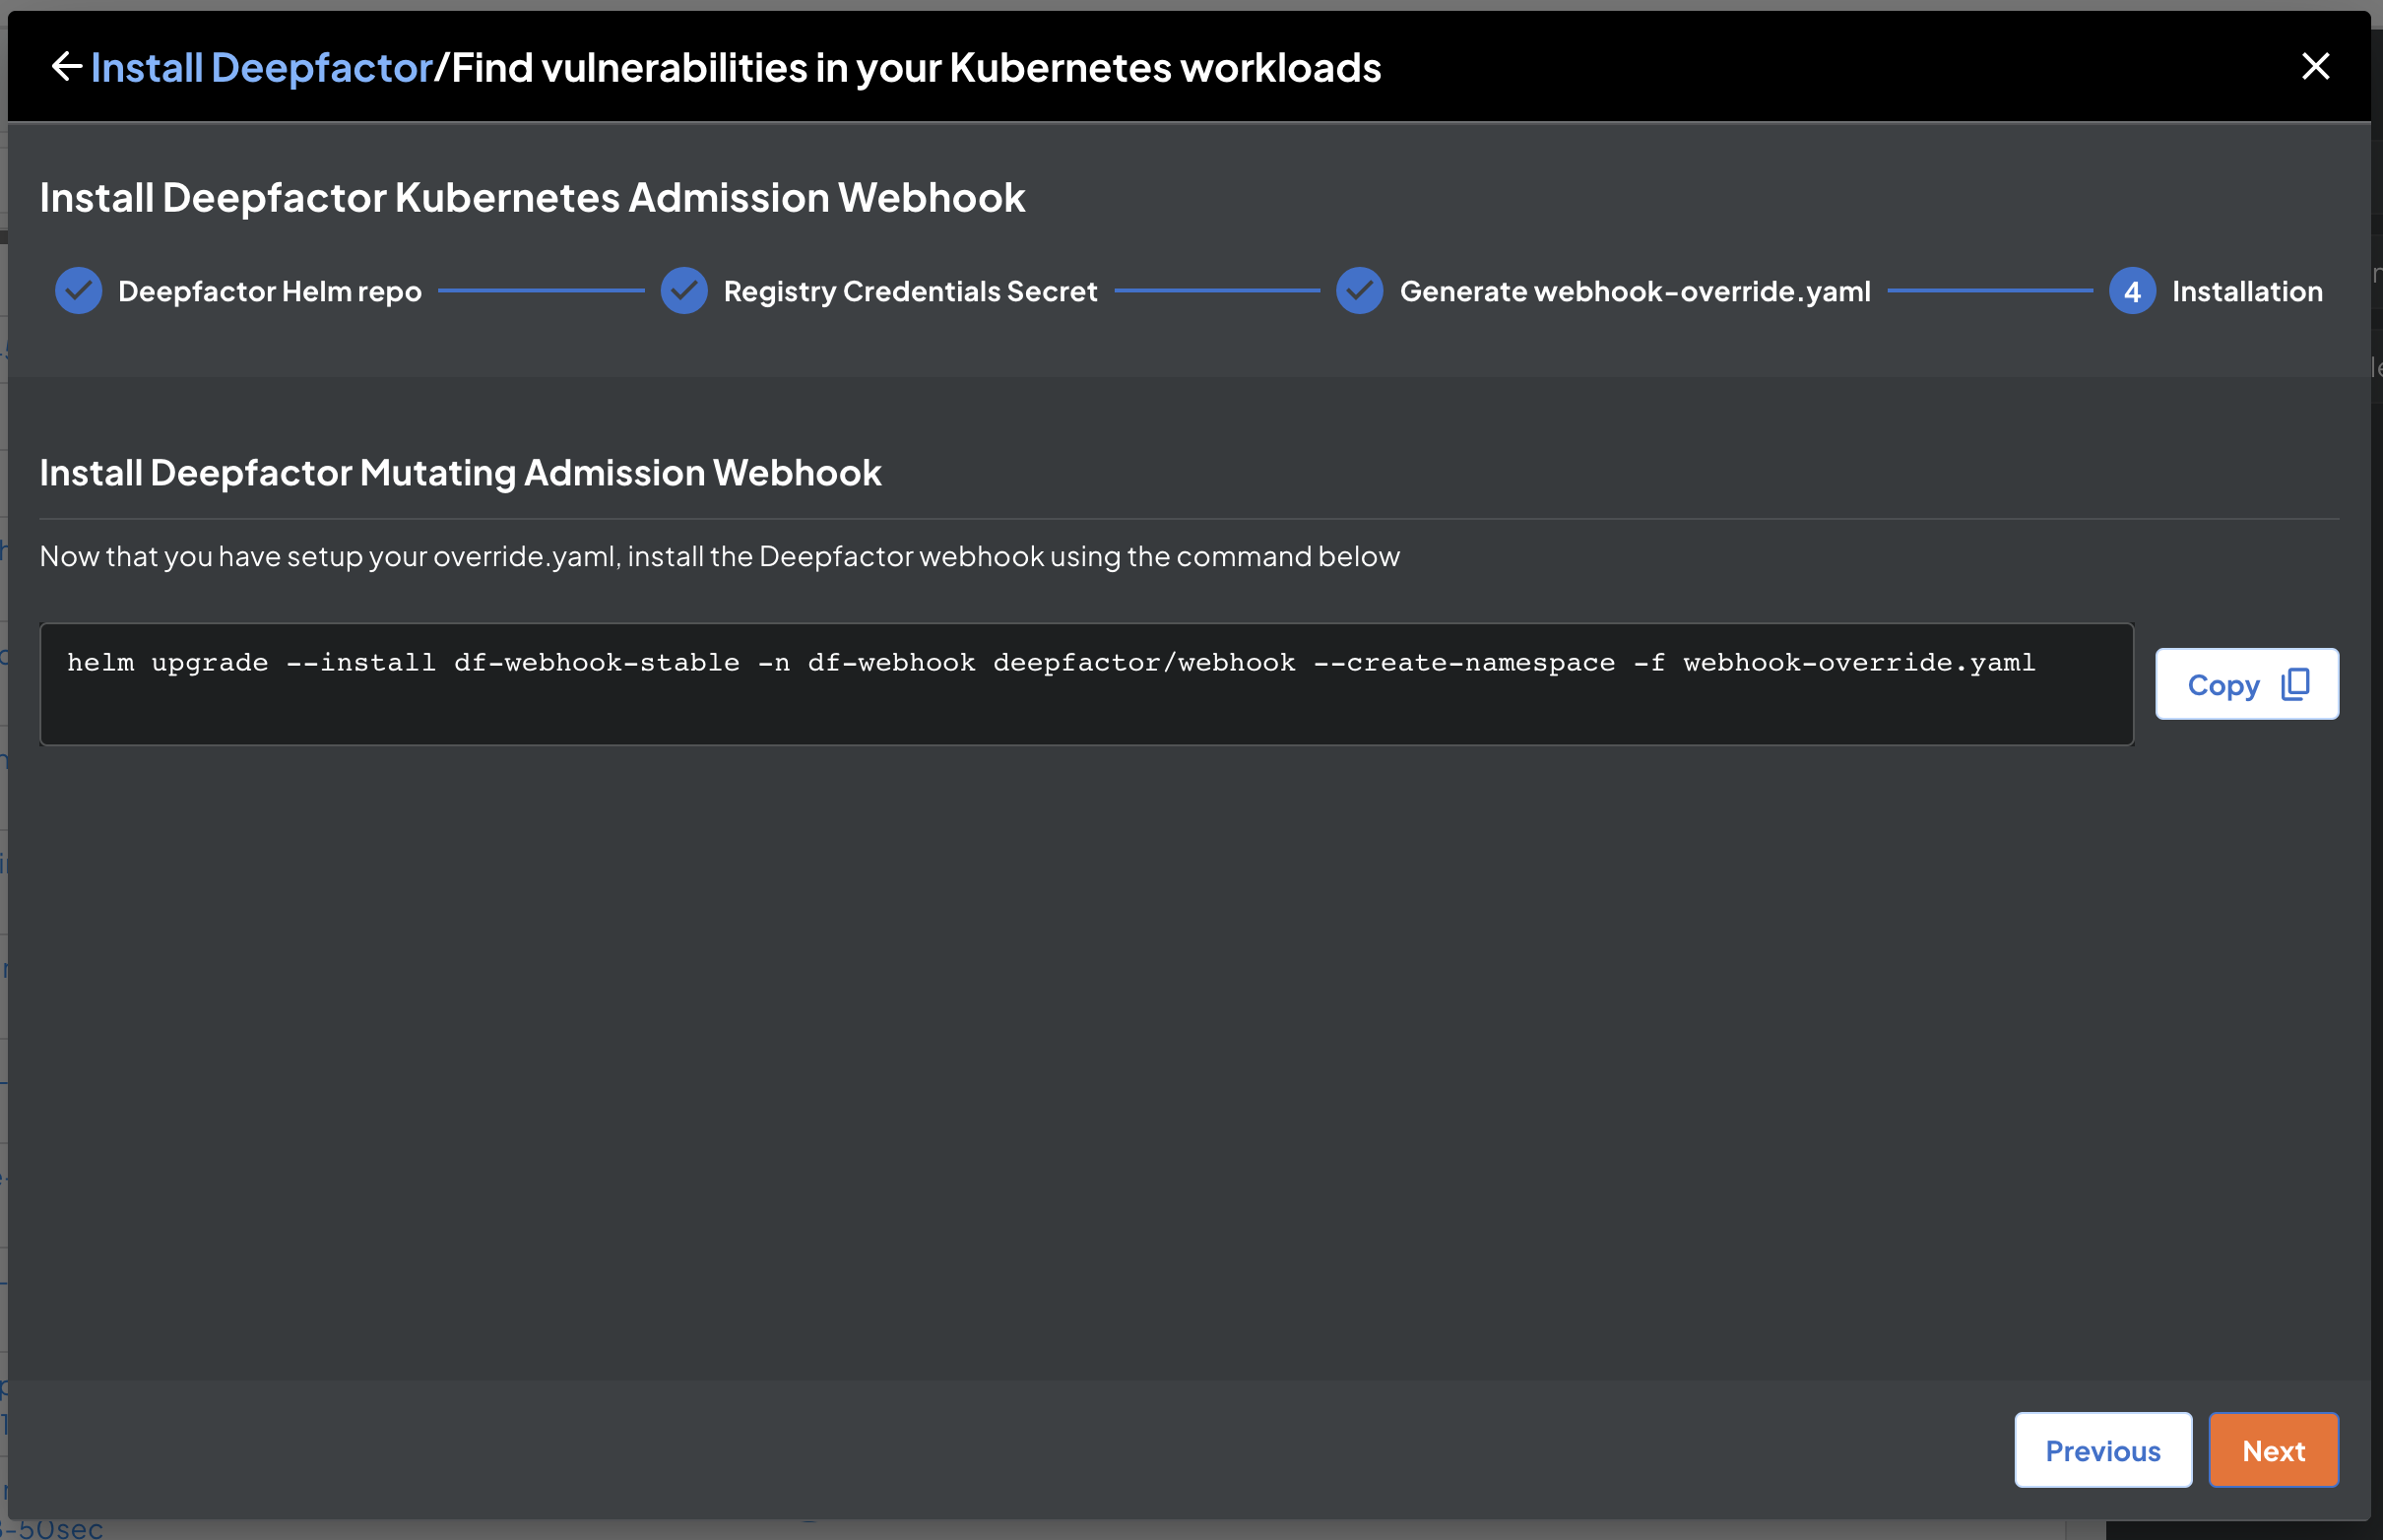
You can reuse the webhook-override.yaml for future upgrades of the webhook.
After successful installation of the webhook, you will be able to view and configure this cluster on the portal UI. To know how to configure the Deepfactor admission webhook, please read the following article:
Configure Deepfactor Kubernetes admission webhook
Upgrade Deepfactor webhook #
If you would like to upgrade the Deepfactor helm charts when a new version is released, please run the following command by passing the same webhook-override.yaml file generated during installation.
helm repo update
helm upgrade --install df-webhook-stable -n df-webhook deepfactor/webhook \
--set clusterName=CLUSTER_NAME_OF_YOUR_CHOICE --create-namespace -f webhook-override.yaml
Uninstall Deepfactor mutating admission webhook #
If you would like to uninstall Deepfactor helm charts from your K8s cluster, please run the following command. Please note, once you uninstall, Deepfactor will no longer scan container images or observe running container instances for runtime security alerts.
helm uninstall df-webhook-stable -n df-webhook
Provide custom TLS certificate for the Deepfactor mutating admission webhook #
Deepfactor can automatically generate a self signed TLS certificate for webhook communication and also use cert manager if it is installed in the cluster as specified in the above section. However, if you like to provide your custom TLS certificates, you can do so by using the following steps.
Run the following commands to generate certificate
rm -rf webhook-certs
export HELM_RELEASE_NAME=df-webhook-stable
export HELM_RELEASE_NAMESPACE=df-webhook
bash -c "$(curl -L https://static.deepfactor.io/scripts/public/df-webhook/cert-gen/certgen.sh)"
On successful completion, you will find the following three files under the certs directory.
- ca.crt
- tls.crt
- tls.key
Please ensure you select ‘No’ for ‘Do you have cert-manager installed in your K8s cluster?’ in ‘Generate Helm override parameters yaml’ step. Pass the generated certificates in the helm install command as shown below. Now the webhook will be installed and will use the manually generated certificates.
helm upgrade --install $HELM_RELEASE_NAME -n $HELM_RELEASE_NAMESPACE deepfactor/webhook \
--set-file=webhook.ca.crt=webhook-certs/ca.crt \
--set-file=webhook.tls.crt=webhook-certs/tls.crt \
--set-file=webhook.tls.key=webhook-certs/tls.key \
--create-namespace -f webhook-override.yaml
After successful installation of the webhook, you will be able to view and configure this cluster on the portal UI. To know how to configure the Deepfactor admission webhook, please read the following article:
Configure Deepfactor Kubernetes admission webhook