
Deepfactor integrates with both Jira Cloud and Data Center so your engineering teams can track security issues as part of their existing workflows.
Integrate Jira Cloud with Deepfactor #
Please follow these steps to integrate Jira Cloud with Deepfactor.
-
Navigate to the Atlassian Developer Console
- Go to Atlassian Developer Console.
-
Create a New OAuth 2.0 Integration App
- Click on the “Create” button.
- Select “OAuth 2.0 Integration” from the dropdown menu.
-
Set Up Your App
- Enter your desired app name (e.g. Deepfactor).
- Click “Create”
-
Configure Permissions
- Go to the “Permissions” tab.
- Configure the following scopes: “read:jira-work”, “read:jira-user”, and “write:jira-work”
- Navigate to the “Authorization” tab.
-
Obtain the callback URL from Deepfactor portal
- Go to your Deepfactor portal.
- Navigate to “Integrations” → “Project Management”
- Under the Jira OAuth 2.0 section, click “Configure Jira OAuth 2.0”.
- In the Jira Integration form popup, copy the “redirect_url”
- Set the callback URL in Jira application
- Paste the redirect_url into your Jira application’s “Callback URL” field.
- Copy the “Client ID” and “Client Secret” from the newly created app as you will need to provide these details on the Deepfactor UI.
-
Configure Jira Integration in Deepfactor
- In the Jira Integration form on Deepfactor portal UI, select “Jira Cloud” as the Jira Software type.
- Paste the Client ID and Client Secret copied from the Jira app.
- Click “Save” to complete the configuration.
-
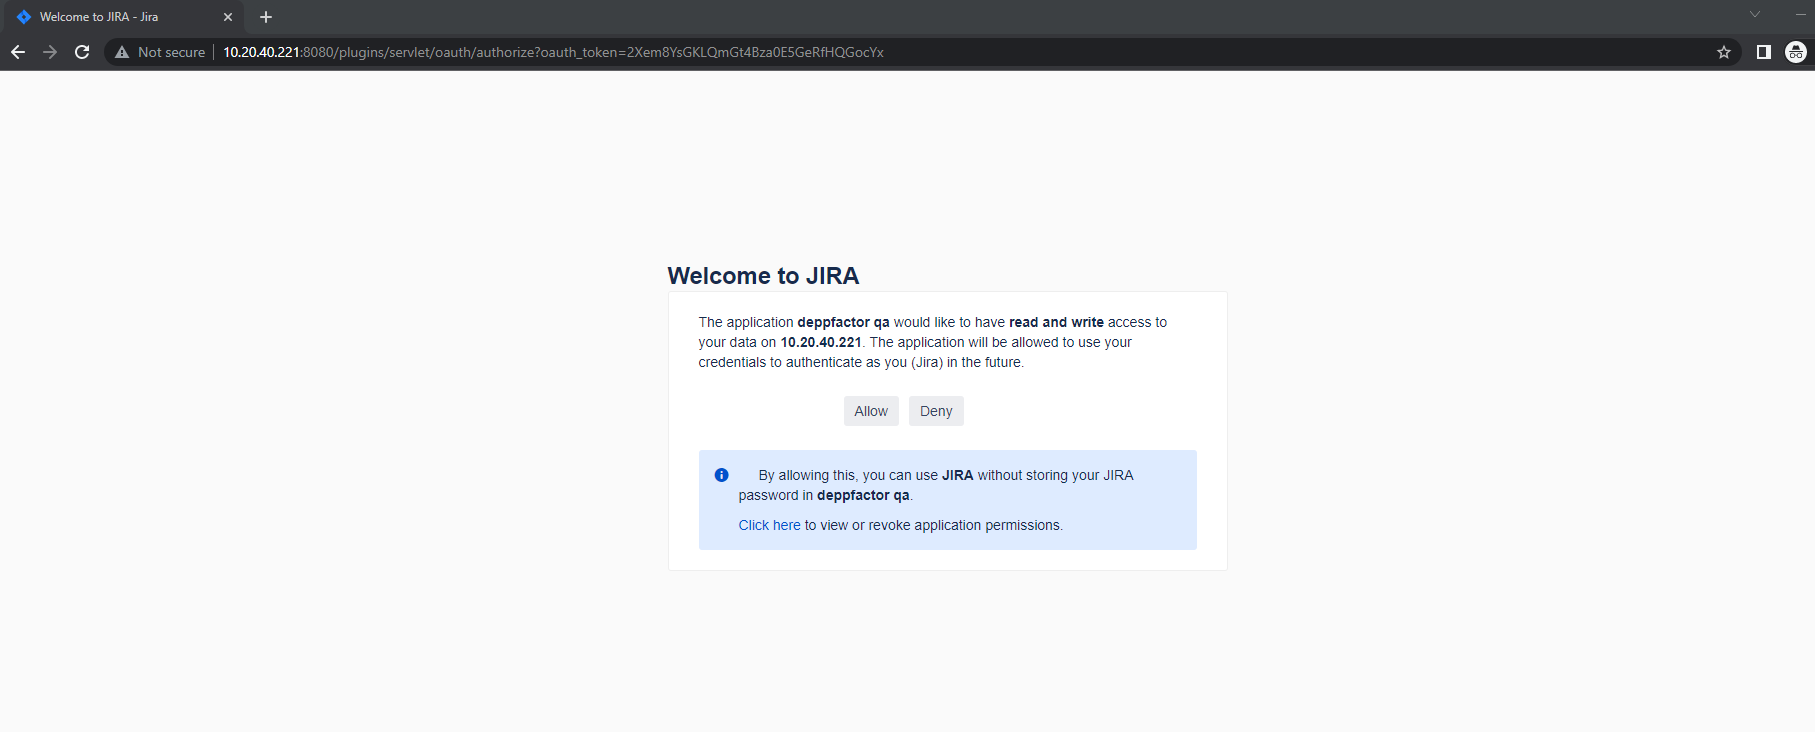
Authorize the Integration
- You will be redirected to a Jira authorization screen.
- Click “Accept” to allow access.
-
Complete the Integration:
- After authorization, you will be redirected back to your Deepfactor portal.
- The JIRA integration will now be active.
After successful integration, you will be able to create Jira issues from the alert screens on the Deepfactor portal.
Integrate Jira Data Center with Deepfactor #
Please follow these steps to integrate Jira Data Center with Deepfactor:
-
Create a New Application Link in Jira Data Center
- Navigate to “Applications” → “Application Links”.
- Click on the “Create Link” button.
- Select “Application type” as “External Application”
- Set the “Direction” as “Incoming”
- Click “Continue”.
-
Configure the Application Link
- Enter a desired name (e.g., Deepfactor).
- Choose “Write” permission.
-
Obtain the callback URL from Deepfactor portal
- Go to your Deepfactor portal.
- Navigate to Integrations → Project Management
- Under the Jira OAuth 2.0 section, click “Configure Jira OAuth 2.0”.
- Copy the “redirect_url” from the Jira Integration form.
- Set the callback URL in Jira application
- Paste the redirect_url into your Jira application’s “Callback URL” field.
- Copy the “Client ID” and “Client Secret” from the newly created app as you will need to provide these details on the Deepfactor UI.
-
Configure Jira Integration in Deepfactor
- In the Jira Integration form on Deepfactor portal UI, select “Jira Data Center” as the Jira Software type.
- Paste the Client ID and Client Secret copied from the Jira app.
- Enter the Jira base URL in the format, https://{jira_host}/
- Click “Save” to complete the configuration.
-
Authorize the Integration
- You will be redirected to a Jira authorization screen.
- Click “Accept” to allow access.
-
Complete the Integration
- After authorization, you will be redirected back to your Deepfactor portal.
- The JIRA integration will now be active.
After successful integration, you will be able to create Jira issues from the alert screens on the Deepfactor portal.
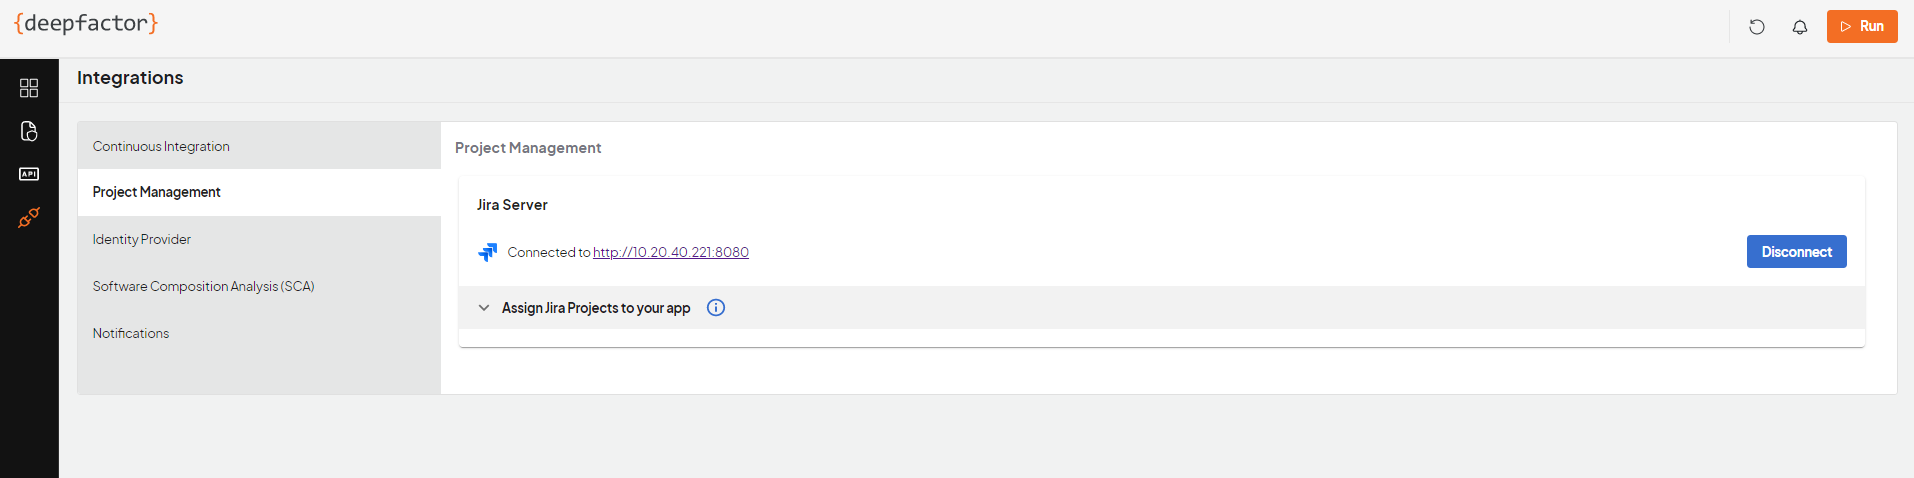
Integrate Deepfactor with Jira Server (Deprecated) #
To integrate Deepfactor with your Jira Server account, follow the steps below:
- Create an application link in your Jira Server using the steps outlined in the following article
OAuth. - On your Deepfactor Portal UI, under Jira Server, click “Configure Jira Server”
- Enter the details from Step 1 and click “Save”
This will take you to an authorization screen on your Jira Server.
- Enter the credentials.
- Click “Login”
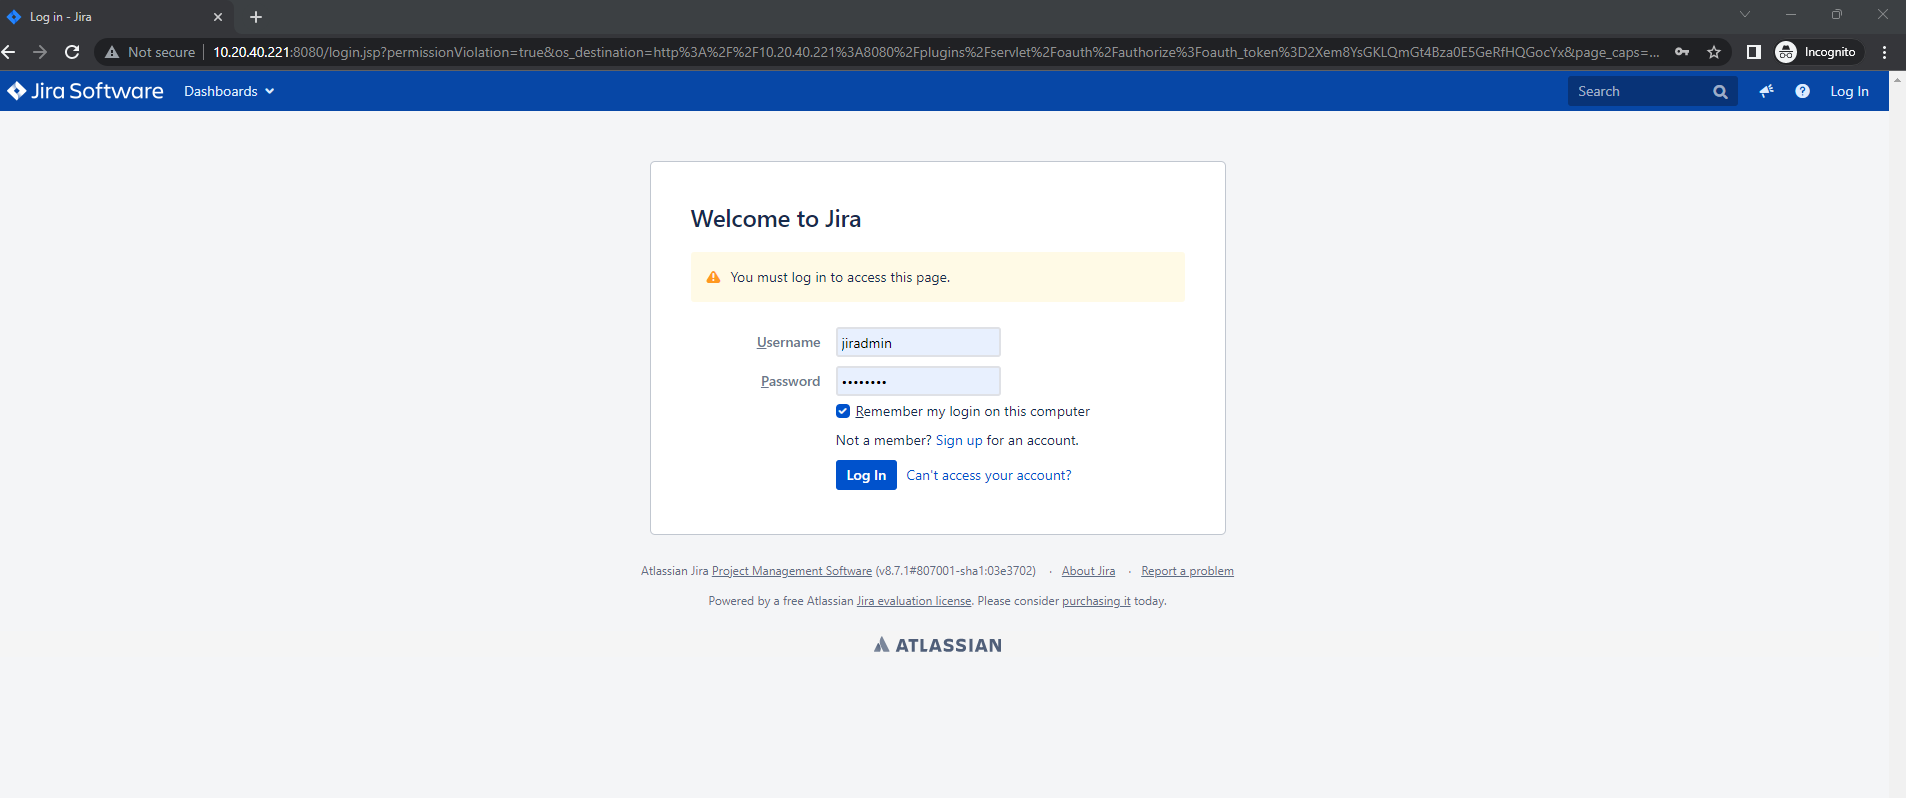
- Click “Allow” to grant Deepfactor access.
After you click “Allow”, you will be redirected back to Deepfactor. After successful integration, you will be able to create Jira issues from the alert screens on the Deepfactor portal.
Create Jira Issues #
You can now create a Jira for each Deepfactor alert on the alert detail page.
To create a JIRA:
- On the alert detail page, click the “Create Jira” icon.
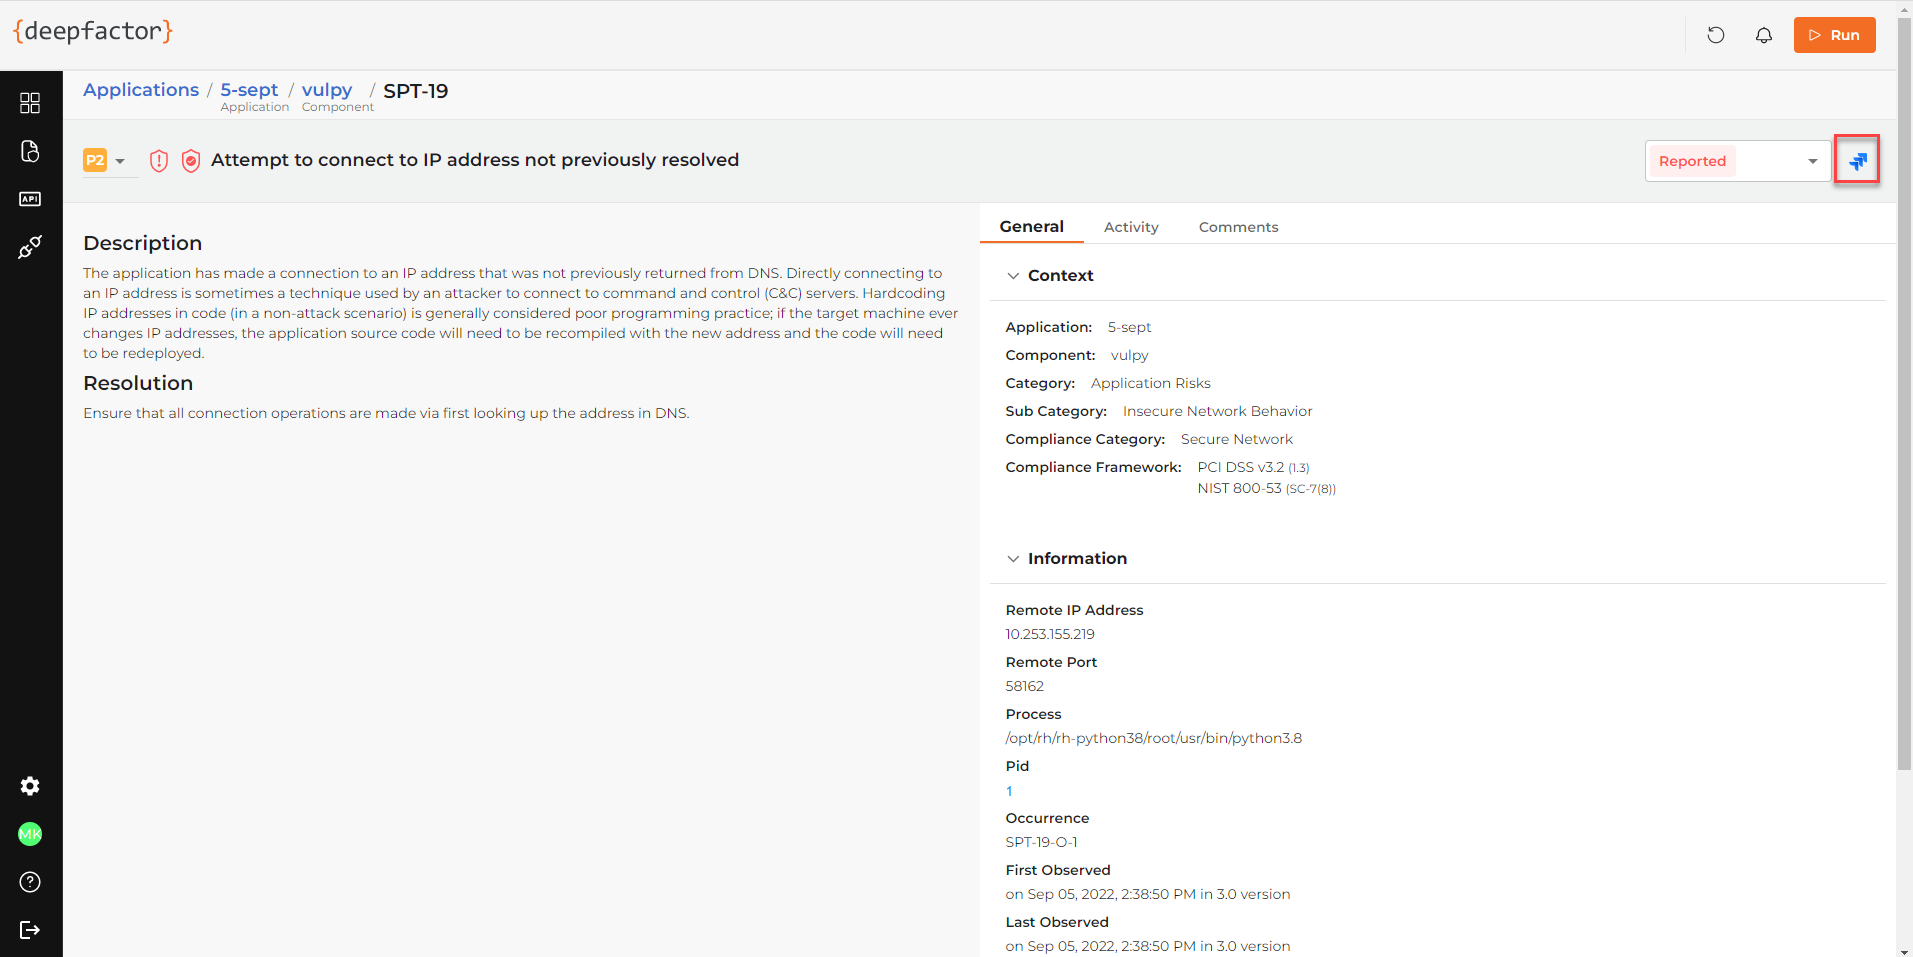
Create JIRA pop-up window appears.
- Click the “Edit” icon.
- From the Jira Project drop-down, select a JIRA project.
- Depending upon the mandatory fields set in your Jira project settings, a form with those fields will be shown on the Deepfactor UI. Please enter the values in the create jira form to create a jira issue.
- Click “Create Jira.”
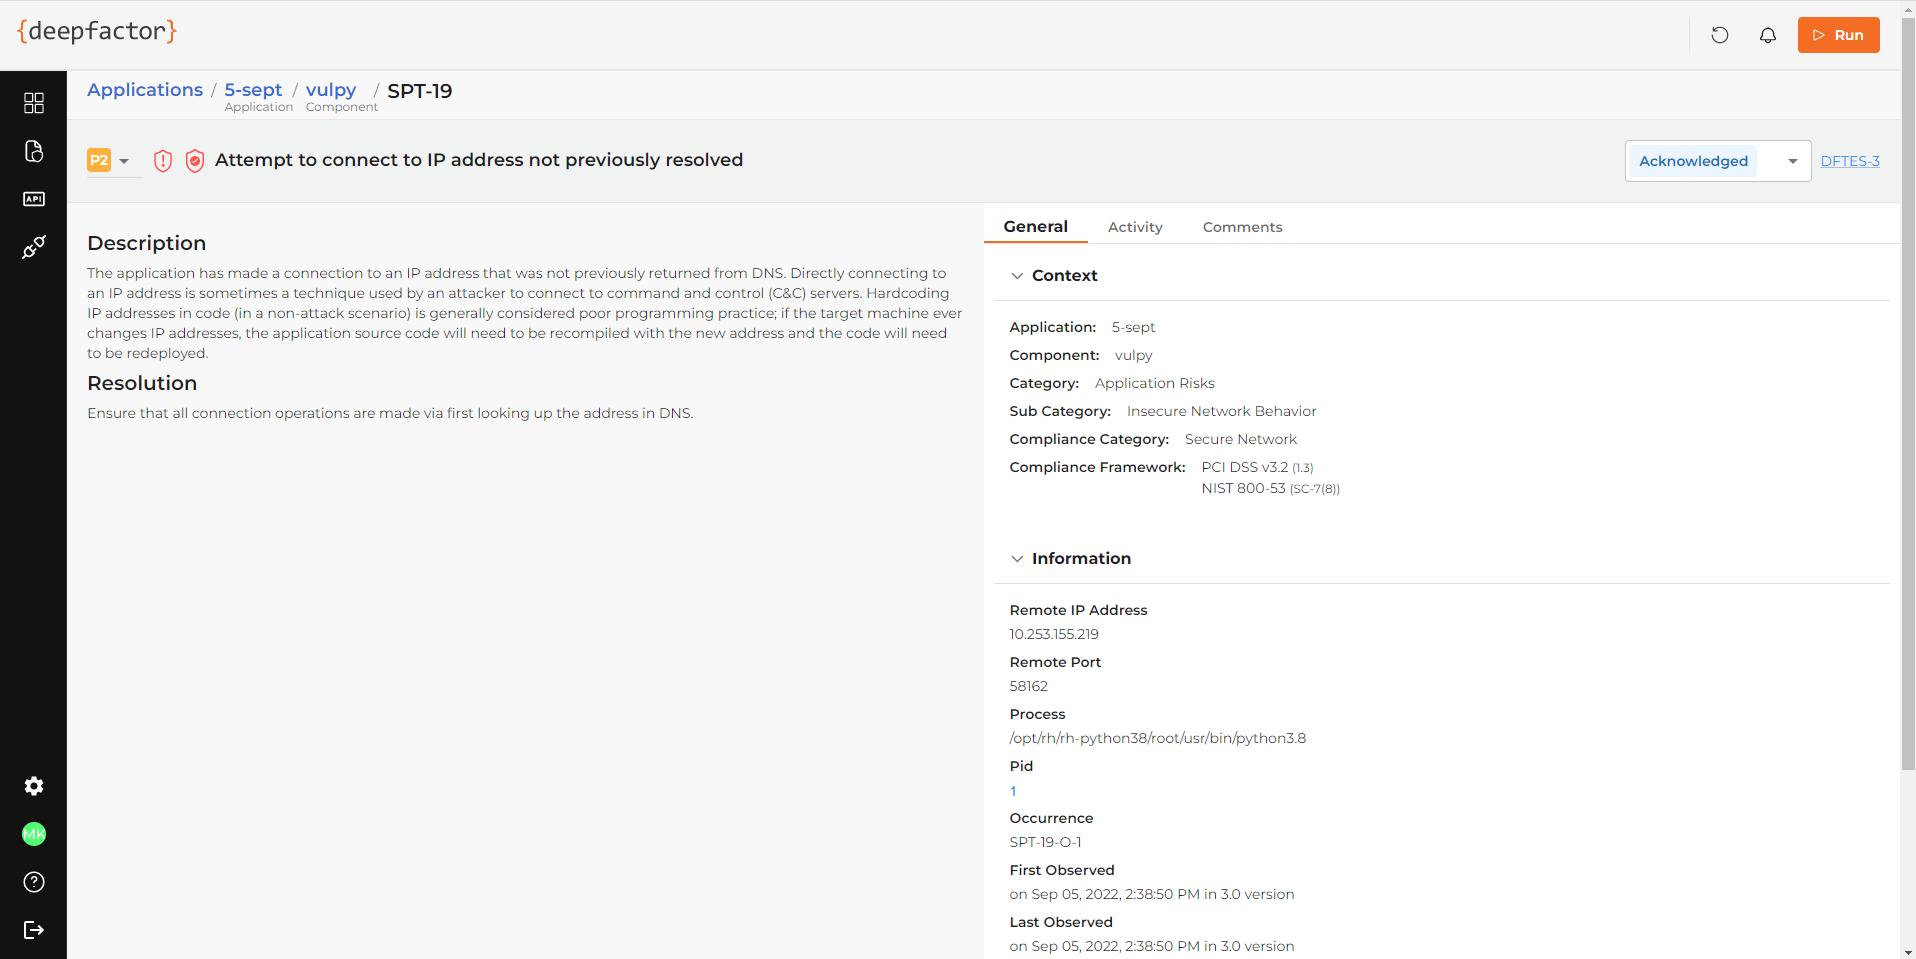
After a Jira ticket is created, you will see the link of the Jira ticket on the alert detail page in the Deepfactor Portal.
Handling Mandatory fields #
In Jira project settings, you can specify mandatory fields which are required to create a Jira issue in that project. On the create Jira form in Deepfactor portal UI, once you select the project and issue type, Deepfactor calls a Jira API to get the list of mandatory fields and renders them in the form for you to fill so we can create a Jira issue in that project.
Deepfactor handles the following field types:
type: string/number/user
type: array/option/version where allowedValues field is not an empty array
Deepfactor does not handle the following field types:
type: array, items:json (Ex: Sprint, user)
type: date/datetime/issuerestriction/parent
type: array, items: issuelinks
type: array/option/version where allowedValues is an empty array
If Deepfactor cannot handle any of the mandatory fields, an error will be shown on the UI along with the names of such fields. In order to create Jira issues from Deepfactor in such a project, you can either mark those fields as non-mandatory or set default values for them in your Jira project’s settings.