Transcript:
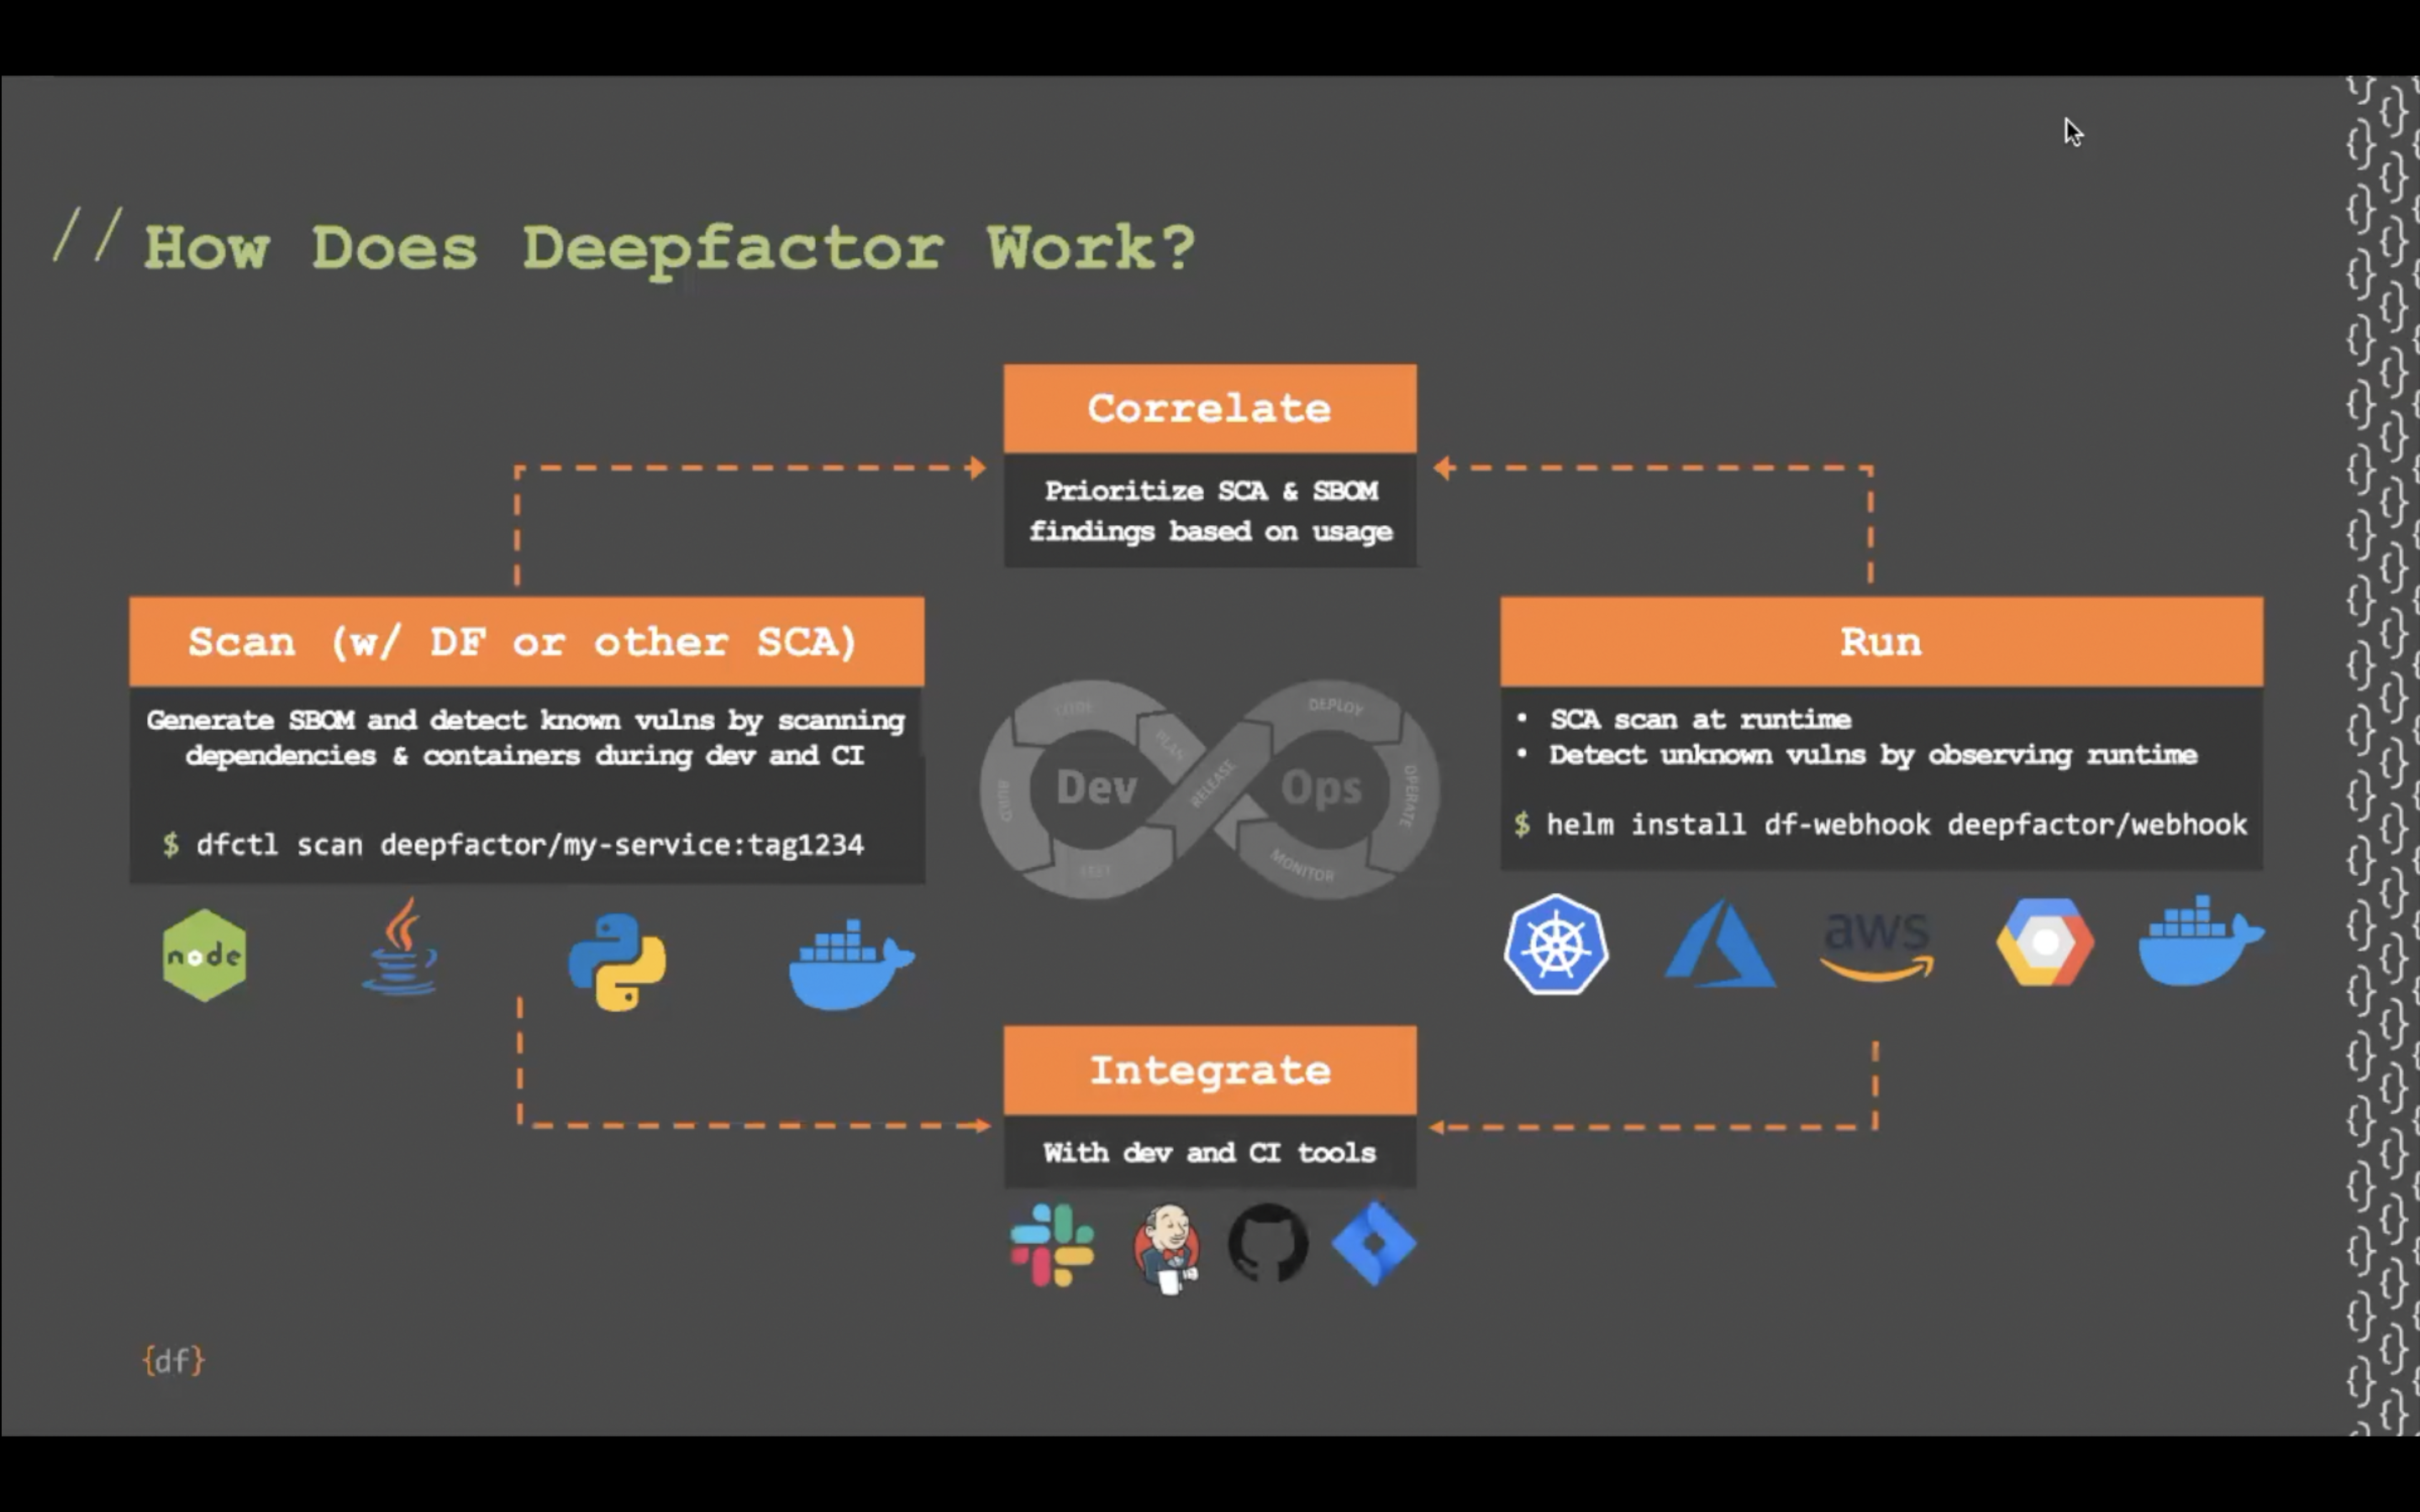
Now once you get started with Deepfactor, let’s go from left to right, the terminology that we use is applications on the right, which is, these are the workloads that are running in your environments, and artifacts is the term that we use for the left. These are the container images, or the file systems that are being scanned, or the build artifacts that are being scanned.
Let’s go to artifacts and take a look at some of the artifacts. In this case, what Deepfactor shows is something that is very similar to standard SCA, or container scan tools, but Deepfactor does a beautiful job of combining SBOM, SCA, and container scans into this one simple pane. When a container or an artifact is scanned using DFCTL scan option, it shows up in this page and its version tag. So if you have multiple versions, you can see it tag based on versions. You can automatically download the bill of materials in industry standard formats like Cyclone DX or SPDX, or SPDX JSON.
And when you click through this artifact, basically Deepfactor scan determines based on a policy whether to alert you or not. And the policy can be used to determine whether… It’s based on two criteria. One is whether your container image has vulnerabilities greater than a certain CVSS score, greater than a certain vendor assigned security. You can set the policies using the alert policies tab here. And the second part of the policy is licenses. So if there’s any unwanted licenses that your developers have accidentally brought in to this artifact or container image, then you can use that to flag an alert as well, such as somebody brought in GPL code for example.
If you’re using containers specifically, Deepfactor does a beautiful job of showing your vulnerabilities per layer, so you actually can, from a remediation perspective, pinpoint which layer it is in your container image that introduce these particular CVEs, and then you can click through to understand the details of the CVEs. Every CVE is accompanied with a bunch of important information like CVSS score, vendor assigned severity. Sometimes the vendor assigned severity doesn’t match the CVSS score. For example, the CVSS score could still be greater than nine, but the vendor assigned severity might say high because the vendor is factored in various other reasons. We show that as well. From a remediating perspective, Deepfactor shows a fixed inversion, which is important to understand which version that one would need to upgrade to remedy the issue. Deepfactor shows some additional metadata information related to the CVE, so you can actually go ahead and fix that as well.
The list of vulnerabilities are shown here, and you can filter this based on a certain SHA of the container or based on a certain severity. Artifact information tab shows the full artifact details, environment variables, other things, operating system that this container image is using in this case, so on and so forth. The alerts tab generates a set of alerts, and these alerts are generated based on the policy that you’ve configured in the alert policies. Like I noted, alerts can be generated based on certain vulnerability levels being higher than a certain threshold or license information being available or end of life components in certain cases. In this case, if you were to go into the alert details page Deepfactor shows the immediately actionable thing here is what upgrade options are available to Deepfactor. That tells you this is the version that you would need to upgrade to for you to fix this vulnerability. It gives you additional details about the CVEs that you may have and so on and so forth.
On the right side, it shows you resource information, additional artifact information such as which image it came from, image version, SHA ID, and it also ties to compliance whenever applicable. It tells you that having this vulnerability for more than X number of days in your environment might violate PCI, DSS, section 6-2-B or section SI-3-2 or something like that. You can have additional activities, so if there’s an activity such as multiple users logging in, adding comments, that activity shows up here and you can go here and add comments. And anytime you want to mark this alert as triaged or untriaged or acknowledged or not an issue, you can change the field here.
If you want to mark the alert as not an issue, you’re required to add a comment, which is going to get shown in the activity later on. The alerts are automatically going to be filed into your Jira, and there’s a Jira integration available here. You can click on this button to manually file Jira as well. Going back to the artifact page… Let me go to this artifact. The SBOM tab shows you the list of components that make up the artifact, along with its vulnerabilities, license information, so on and so forth. And SBOMs can be downloaded in all of the accepted formats, industry standard formats from here. And if you want to download SBOMs for other versions of this container if there exist other versions, then it’s automatically shown in this dropdown so you can pick and choose which version it is that you want the SBOM for, and download that specific SBOM.